
"A walkthrough? Walkthrough what... it's a fighting game!?!" Yes I know, and it's not even a really involving fighting game like River City Ransom, but guiding you through the game is not the purpose of this walkthrough. No, its purpose is to offer suggestions on how to go about defeating the enemies in each scene as well as how many enemies to anticipate, and the best course of action. Following the strategies of a well seasoned DD2 player like myself may be the key to staying alive in this game. So read on!
Mission 1: Into the Turf
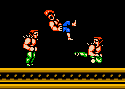
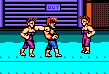
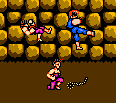
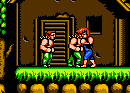
| Once you begin the first mission you are immediately approached by some gansters doing cartwheels. Ironically, their names are "Williams" but I assure that I don't approach anyone doing cartwheels, let alone someone who is pissed and rarin' to kick in my teeth. Attack the two that approach you, making a valid attempt to nail one of them in mid-cartwheel with a cyclone kick. After one of them perishes, another should approach; annhilate him. | 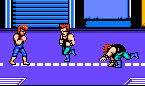 |
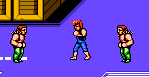 | Move to the right as indicated by the arrow. Here you are met by a "Roper" on each side of you. Attack the one on the right first (the left one should leave you alone while you pound on his friend). Then turn to the Roper on the left and pummel him with a couple of uppercuts. As you attack him another Roper appears from the right. Remove him, then proceed to the right. |
| One of the things I most love about this game is the multiple oppurtunities to hit enemies with power moves ins unique situations. Two "Lindas" should be coming down that ladder on the right. DESTROY them with a cyclone kick. Then nail the third one down the ladder with a cyclone kick. Then, approaching from the east are more Williams. Defeat them and then continue up the ladder. | 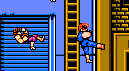 |
 | Here is your first taste of weaponry. These Lindas are packing Chain Whips. They're quite easy to disarm though, so no fear. I really don't even recommend using the whip in retalliation though as it is quite slow and has virtually no distance. Just a few uppercuts and some good punches should do the trick... oh, and do try to knock someone off the ledge... |
| Proceeding to the right you are met by knife-bearing Williams, three of them to be exact, who should be taken out promptly. Don't hesitate to use the knives either as they are a superior weapon. Up the ladder and to the left you are met by 2 Ropers. I think you know what to do here... get it done. |  |
 | Past them and up the second ladder are 2 Williams carrying iron pipes. Careful, they can launch them at you. After you've knocked the pipes out of their hands, grab one for yourself and start swinging and flinging. After they are dead, two more should approach under similar conditions. After you defeat them the boss music should begin to play. Move right. |
| To the right is the stage one boss, a rather large fellow named Burnov whose main attack is to grab you by the neck and pound you in the face. The best course of attack is to go in for a cyclone kick; as he ducks and you land, nail him with an uppercut. Now that you're on top (or behind) him so to speak, nail him with cyclone kicks and uppercuts before he has a chance to grab you. If he does snag you, move away quickly after he drops you so there's no repeat snagging. After 2 or 3 kicks/uppercuts, he should disappear, leaving only his mask. Don't be fooled though; he reappears shortly. Just one more solid power hit should put him out for good and advance you to level two. Heh, now wasn't that fun? Let's move on. | 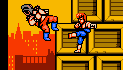 |
Mission 2: At the Heliport
 | Now you're on the roof. this mission will require some careful jumping and a bit of timing, but nothing too big. To start us out, there is a gap in the roof that must be crossed. Any hyper, giddy NES kid's intial reaction to this situation would be to do a spectacular cyclone kick over the gap and land on the other side. Well let me tell you something... don't. Said kick would give you just enough steam to cross, landing you right in front of the standing Roper there who could easily kick you off the ledge. |
| No, instead go for the dropkick, taking out the first Roper. Next nail the second one with a cyclone kick sending him to oblivion below. Uppercut the Roper you knocked down first, drawing the kneel necessary to pull the move off from the landing of the kick you delivered. In three short moves, you should be able to clean house. | 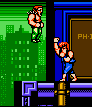 |
 | From that section of the roof follow the arrow down the make-shift ladder to a lower level. There is a little jump there that shouldn't be too big of a problem. On the other side you are met by a Roper on the same level and one who is approaching from the top. Go for a cyclone kick on the same-level Roper. As he ducks, land next to him and nail the uppercut. He should fly back but not quite far enough to fall off. While he's stunned, knock the guy coming down the ladder off with a cyclone kick. He should fly to the other side of the pit or into the pit, depending on how high up he was on the ladder. |
| Upon landing from that kick, you can use the kneel to finish off the Roper on the right with an uppercut. He should fly into the pit, but that doesn't matter because he's already dead anyways... the pit is just added effect. Then, if you didn't knock the ladder guy into the pit, you can nail him in mid-jump with a cyclone kick. Boom, he's toast. | 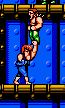 |
 | Upon defeating those enemies, move up the next two sets of ladders. When you reach the third one, climb up quickly then climb halfway back down. A helicopter will fly in from the right, and fire a series of machine gun blasts. The first one will be under you, after that you can get off the ladder and wait for it to come to a stop. |
| After the copter has come to a stop people begin to exit. First a pair of Lindas come down the ladder... easily knock them down into the pit with a cyclone kick. After them comes a set of Williams, dispose of them in the same manner. Finally is the first pair of Right Arms in the game... not much of a showing though... knock them into the pit as well. Now climb up the last ladder and move to the right. | 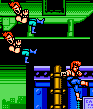 |
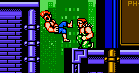
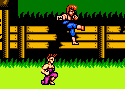
 | Moving right, you are met by Ropers on both sides (depicted on the left is what NOT to do). If you go for the one on the right with the cyclone kick early enough, he might actually jump into it, but if he ducks, nail him with an uppercut. Then finish him off before you are approached by the one on the left. Destroy him in a fashionable manner. Then another approaches from the right... do they never quit??? Finally, the last man comes from the far right. After defeating him, quickly move to the nose of the helicopter. |
| Any moment now, two twin ninjas will speed at you from either side... you must be ready. The nose of the helicopter is the best place to register a cyclone kick and knock down both of the ninjas. If you can manage to pull off the first one, they again will approach you at the same time... do it again, and again. If you don't hit the kick, there really is no way to predict the ninjas' actions, but I can say that if you don't jump around too much, they usually stop thrashing you for a few moments... these precious moments are your chance to capitalize. After you do defeat them, the helicopter begins to take off. Oh no! Catch it! |  |
Mission 3: Battle in the Chopper
 | Luckily, you caught the bottom rung of the helicopter ladder at the last possible second. So you made it on to the helicopter, but are unsure where it is going. Unfortunately you don't have much time to ponder that question before you are attacked from the left by two Right Arms. There's really no quick disposal route here, so just fight it out with them. Try to stay away from the door in the top right corner... it opens and shuts. |
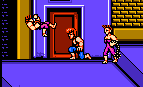
| After you defeat them, make your way to the door on the left and wait for two Williams to enter. Try to nail them with a cyclone kick before they can move away. Once you beat one of them, another enters in. Again, try to stay away from the opening door during your skirmishes and that includes forgoing an attempt to pick up a metal pipe that's near it. Once all the Williams are defeated move towards the left door. |  |
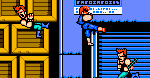
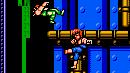
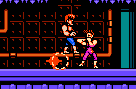
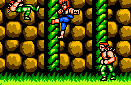
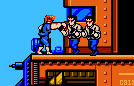
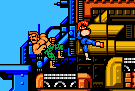
 | A massive human being will enter from the left. This is Bolo. Say hello, Bolo. "Grr.." Bolo is not your friend. Try to hit him with a cyclone kick when he enters. After he bounces off the wall, continue the assault. As with any big guy, use the standard jump in-land-hit uppercut technique. That should service you well. Unfortunately for you, Bolo is not alone. Another of his kind enters unexpectantly from the left after you defeat the first one. Again, use the same tactics and try not to let what's happening in the picture on the left, happen to you. After you defeat the behemoths, the helicopter has landed... but where? |
Mission 4: Undersea Base
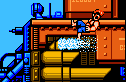
| It appears the helicopter has landed at some seaside base... As soon as you begin this next level, quickly move to the right and attack the oncoming Ropers. If you stand still, you will get pelted by their boomerang. You more than likely won't hit you first power attack, but brawling it out with these guys is better than a cheap shot to the head from a boomerang. After you defeat the first two, another approaches. When they are annhilated, move right while taking care not to fall into the water below. |  |
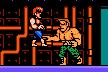
 | Here you are met by two easily disposed of Lindas, regardless of what the picture shows. Easily dispose of them accordingly while taking care to do some sort of power move that sends them flying into the nearby wall and bouncing off of it. Yes, you can do it... no one is watching... :D Then, another approaches. When you're done, move right and take the elevator below the water. |
| The important thing to remember once getting to the lower level is don't get sandwiched! Immediately begin punching off the screen at the right. A Right Arm will walk into your fists and another will approach from the left. Once you have the right one down, work on the left as another comes from the right. Work quickly and effectively... if you get sandwiched... it can be brutal. | 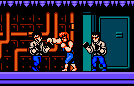 |
 | After you have all three Right Arms put away, again begin punching wildly at the right for approaching soon will be the next big man of the game, Abore. Sure, you may want to see and marvel at this new character, but he by no means wants to marvel at you, so punch like a madman. When he chops you down, begin jumping up and down (don't worry, the spikes knock you down but don't hurt you) and each time you land press the attack button and over to try and pull off a high knee. After sending him flying twice in this manner, he shouldn't come back for more. Move left... watch out! |
| Watch for these robotic arms! Move quickly past the first two, you should have no problems getting by them. Now stop and take your time with the remaining few. Take care not to get hit by them because they take away an entire life pellet. Move right. |  |
 | Upon arriving in the next screen you'll notice a large gap in the ceiling. Enemies will fall from there, but in order to get the first wave to come down, you must move just past it, preventing you from destroying them with a cyclone kick. Two Lindas fall down (careful, they carry fire bombs) then another, and after that, three Williams come down (careful they carry knives) in the same manner. |
| Now posistion yourself under the the gap in the ceiling. Approaching from the right is Bolo. Now, each time I play I end up beating him a different way, so I'll just give you a basic summary of how I do it. First, I go for a cyclone kick, causing him to duck, then I hit the uppercut upon landing from the jump. Now, I stand behind him and pelt him with rights and lefts. Sometimes this will work, sometimes it won't. If you are able to knock him down somewhere under the gap, try for a jump/duck/uppercut combo again. When he's down for the count, move right, enter the door, and hold down. |  |
 | Now if you held down here, you should have safely moved over the conveyer belts and on to the white ground. If you didn't... you probably died. Here, you should first leap across the two straight edged white platforms. When you reach the other side, getting into the door can be a bit tricky. Board the bottom conveyer belt, you will quickly move to the left. Right before you reach the edge, move up towards the door. It should open and snag you. SHAZAMM! You made it!. But exactly where is "it?" |
Mission 5: Forest of Death
| You must now enter the Forest of Death. From this point on the quest tends to get harder and harder with each level you advance, so keep your guard up. Walking into the forest you are approached by a chain-weilding Linda and one carrying nothing. Once they are quite easily defeated another Linda with a chain follows... dispose of her accordingly.
|  |
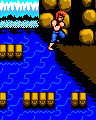
 | Walking right you come to a drop-off. Move as far to the right as you can before you jump down. If you jump down too soon, you may lose a life. The Roper on the level below is killed with one hit, so don't be afraid to destroy him with some sort of power move. Every so often I hit him with the hyper knee and hear him fall and splash in the water. That's like a trophy on a gamer's proverbial mantle... Following that, move down the ladder. |
| Hit the Linda coming at you from the left with a cyclone kick, and then with the landing, nail the other one with an uppercut. One of them is carrying a chain, but I killed them too fast to notice which one. Chances are, you will too. A third one approaches, defeat her then move with caution to the right.
|  |
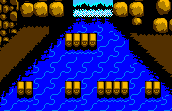 | You now come to a waterfall and a river with some logs spread out over the water that you must jump on to cross. It is possible to make it across the top row (the row with just one log bridge section) but I can only make it 50% of the time without landing in the drink, so for self-preservation and safety's sake, take the bottom row. |
| Jump out onto the first platform and then jump to the next. You shouldn't have any problems landing on either of these as long as you're lined up with the platforms you don't do anything weird. Jump to the third platform, then move back to the left half of the platform before jumping to the last one. From there hop onto shore and move up and to the right.
|  |
 | Here you fight some irate Ropers who climb down these huge ropes. You can try to knock them off the ropes with a cyclone kick, or you can just take 'em out ground-style like you always do. If you let them get far enough away from you they will throw boomerangs... so watch out. When the three are defeated, move up the ropes. |
| At the top of this cliff is a shack-like building and from its door come Ropers with dynamite (grenades). If you jump at them they will probably knock you down with a stick of dynamite, so try to wait till you're relatively close, then cyclone kick up and land in the pack (of two I believe), hitting them both with the uppercut. Be careful of the pit on the left. When they are deposed of, move quickly towards the door and prepare to execute the cyclone kick quickly.
|  |
 | Out of the door comes Bolo, but if you prepared yourself you should be able to cyclone kick him into the pit with minimum difficulty. If you didn't prepare or missed, DO NOT COMMENCE FIGHTING! Move quickly to the right so Bolo cannot toss you over his head and into the pit. Once you're over far enough that if you were to be thrown you'd still be with us, you should then try to take him out with cyclone kicks and uppercuts. Another one comes out the door in the same fashion as the first, use the same strategy. |
| Moving right, you jump down the side of the cliff to a road of sorts. Approaching from the right is a pair of Chins... yes, the fierce fighter Chin Taimei from the original Double Dragon. Decked out in green garb and carrying two blades each, these guys are no pushovers. When you move in and take one down, the other will more than likely flip into you for a hit. That's cool though, keep in, mixing combinations of uppercuts and cyclone kicks. Avoid getting into a fist fight with these guys, because you probably end up on your ass. | 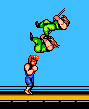 |
 | When they're taken down, a giant steam machine moves in from the right. It looks sort of like a bulldozer and sort of like a train. It was either Linque or Johnny who said that this might be the equivalent of the front-view farm machine in the arcade game. Here your goal is not to avoid it though, but to reach the top of it. Be patient, it might take a few tries. Jump onto the first set of conveyer belts. When the steam from the pipes can be seen jump to the right. It's best to wait until the steam is coming out of the top or bottom pipe to jump, because the middle will immediately knock you back. Once you're on the pipes, quickly jump up them to reach the top. If you get knocked back, just try again. |
| At the top you are met by Ropers w/ dynamite... not a huge threat, but you should definately pay attention to those red flashing sticks of death, especially if you lost life trying to get past the steam. After you kill the intial two, another appears. Following him are some Right Arms. They should be taken care of with a volley of power moves.
|  |
 | The final enemy of the forest is Abore, and while he was a force to be reckoned with in the Undersea Base, here he is a force to have fun with. Feel free to knock him off the high perch and then cyclone kick him back down right before he reaches the top. Sure, that's rather mean but think of it in this manner... your toying with him is punishment for his terrible wardrobe in the arcade game. Once he's done for, you've completed the level. |
Mission 6: Mansion of Terror
|
According to some people the hardest level in the game. There are lots
of tricky jumps and you need good timing to make it out unscathed. Jump
the steps until you reach the pit and make sure you donĺt fall between
the steps. There are different ways to jump over the pit with the
disappearing platforms. You can jump from the second platform all the
way to the other side, or you can jump to the third platform immediately
which is my preferred method. In any case, you want to make as few jumps
as possible, so I advise against using the second platform. Be careful
not to get hit by the falling flames, as they will most likely knock you
into the pit. Just wait until the candle closest to the pit drops fire
and jump on the third platform. |
|
| |
Proceed to the left and three Right Arms will appear. You can get a
preemptive strike by doing a cyclone kick just before they appear.
Defeat them and three Chins will appear. Just cyclone kick your way
through here and proceed to the left. |
|
The last part of this level is one of, if not the hardest part of the
game. Watch the pattern of the disappearing platforms and time your
jumps right. Make sure you donĺt jump over the third platform, which is
a common mistake. When youĺre on the last platform and ready to jump to
the exit, stand on the right portion or you'll jump into the little pit
with spikes. If youĺre too late you'll fall down and have to start over
again, but at least you wonĺt lose a life. |
|
Mission 7: Trap Room
| |
You can jump from the first conveyor belt all the way to the third,
which is not as hard as it may look. If you jump from the first to the
second, make sure you stand on the left portion of the first conveyor
belt so you wonĺt fall into the pit. Exit this room. |
|
Cyclone kick the lone Right Arm as this particular one will most likely
attack with a jump kick. Make sure to kill him quickly or otherwise
youĺll have to fight Burnov on a small strip of ground. Stand to the
left as much as you can and wait for Burnov. Jump over him and hyper
knee him into the spikes. If the knee fails try cyclone kicks but
whatever you do, make sure Burnov is between you and the disappearing
floor. When youĺre in the corner and he knocks you down, your only hope
is the hyper knee, because you wonĺt win a punch-out when he is that
close. If you try to jump heĺll just knock you out of the air. Once heĺs
finished, exit the room. |
|
| |
The gear room may seem difficult at first, but itĺs quite easy if you
remember the pattern of the spikes. The gear in the top right corner is
the biggest obstacle in this room. Wait until the spike drops and the
gear stops. Step on the gear and jump on the platform. Stand on the
right portion of it and jump to the second platform. Wait until the
spike drops until you jump to the final gear. Immediately jump/hyper
knee to safety as soon as you touch the gear. Exit the room. |
|
Another room with a disappearing floor. You will fight four Ropers who
are a lot stronger than their earlier counterparts. They also carry
dynamite so rely on your cyclone kick and hyper knee as much as
possible. If you try to head grab them while they are at full health
they will just shrug you off. Stay to the right of the screen as much as
possible and continually do cyclone kicks and hyper knees, even if they
are not on the screen. Occasionally walk to the left when they throw
dynamite. When youĺre done, exit the room. |
|
| |
Ok, this is the final part of this level and there are a lot of enemies.
First take care of the three Williams. They carry knives so stay close
to them. Next up are the Ropers. They carry dynamite, but you should
have no problem avoiding that since you can scroll up and down in this
room. Next two Chins will appear, kill them however you like. Now it
gets tough. Two Right Arms will appear and they are extremely tough.
Even two well placed hyper knees wonĺt kill them. You have a slight
reach advantage over them so stay at punching distance and donĺt move
in. If you do, theyĺll knock you down or shrug you off when you hair
grab them. Also, donĺt approach them head on since they will most likely
jump kick you. Scroll up or down slightly when you walk towards them. |
|
Finally youĺll have to fight Abore again, and as you probably expected
he too is a lot stronger than before. If youĺre not that good at doing
hyper knees, align yourself with him and punch him until heĺs dead.
|
|
Mission 8: The Double Illusion
| |
Walk to the right and dispose of the two Chins. Make sure you donĺt fall
into the spikes. Proceed to the right and kill the Right Arms as
described before. Note that they gang up on you by coming from different
sides. Climb the ladder or jump down. If you jump, be careful not to
jump before the white glove appears or you will lose a life. Kill Abore
and the pair of Bolos while staying away from the bottom of the screen.
Move to the right and kill the four Ninjas using cyclone kicks. Usually
being able to scroll up and down is in your favor, but now the tables
are turned. The Ninjas are very fast and theyĺll use the entire room to
confuse you. You can lose a few lives here if youĺre not careful. When
youĺve killed them youĺll fight ĹThe Illusionĺ, a carbon copy of you and
your moves. Or is he? Unlike you he canĺt jump or perform a hyper knee,
but he can crouch at will. Hyper knees and uppercuts are very useful in
this fight, as he will most likely win a punch-out. You also canĺt hair
grab him until heĺs almost dead. Next up is the top dog, the Shadow
Warriorů. |
Mission 9: Final Confrontation?
|
Walk towards Marion and behold, itĺs the infamous leader of the Shadow
Warriors. The final boss can take 3, sometimes even 4 units of your life
away with his most powerful attack, a cyclone punch. Make sure you avoid
this attack at all costs. Donĺt trade punches with him, heĺll win.
Winning this fight is hard, but not impossible. Make sure you have your
back turned to him at all times. When he approaches you, kick and move
away two or three steps. Most likely he will punch into the air, or just
follow you. Now kick him for the second time. He will be stunned. Turn
around and uppercut him. When he gets up, hyper knee and repeat. When he
turns invisible, zig zag the screen scrolling up and down until he
reappears. Whatever you do, never use the cyclone kick as he will just
dodge it and cyclone punch you on your way down. |
|
When heĺs dead, enjoy the cheesy ending of possibly the
greatest fighting game ever. |